By Michael A. Black | Contributing Writer
I grew up watching westerns on TV and in the movies and always marveled at the fast draws those heroes exhibited.
Years later, when I studied the actual historical aspects of the Old West, I found out that the “fast draw” depicted in those westerns was really a falsehood promulgated by Hollywood to make their movies and TV shows more dramatic. Not that there aren’t fast draw masters today who regularly compete in competitions and set records. I’m always impressed by them, but for the majority of us who carry a gun, drawing your sidearm and firing it isn’t anything like Matt Dillon shooting from the hip on the dusty Dodge City street each week in Gunsmoke. In the real, not “reel” world, being able to draw and fire your weapon effectively and successfully has four essential elements.
Choose the Right Holster
Consider what your particular needs are as far as when, how, and why you’re carrying a gun and pick the holster that best meets those needs. The first time I carried a handgun was back in my army days as a Military Policeman. We carried a Government Model Colt .45 in a big, one size fits all leather holster with a covering flap.
Besides escorting conveys, standing guard on gate duty, and patrolling in our Jeeps, we broke up a lot of bar fights. The covering flap on the holsters had a slit in it which fit over a metallic nipple securing the flap. While this wasn’t the most ideal way of securing a pistol, the forty-fives were further secured by a white, nylon lanyard cord that was clipped to the handgun’s magazine. The lanyard was then fastened around one’s shoulder and secured by one’s uniform shirt’s epaulet.
When I got into civilian police work a few years later, our revolvers were secured in leather holsters with a sturdy thumb-snap. The holsters were specifically designed for the particular make and model of your gun. They were generally effective, except when you’d unsnapped your gun anticipating trouble and then unexpectedly got into a foot chase. My buddy Joe was chasing a couple of felons down the street when he saw a big old Colt Python bouncing on the asphalt. “Gun,” he cried and reached down for his weapon only then finding an empty holster and realizing the bouncing Python was his.
As police departments transitioned to semi-automatics in the 1980’s, holsters began to evolve as well, with built-in retention safeguards that secured your handgun automatically with such things as a locking mechanism on the trigger guard. This prevented the weapon from falling out of the holster during a pursuit or fight, and also limited an assailant’s ability to steal your gun. Various safety levels of securing your gun were available with different holster levels.

Getting back to our first element, the axiom is simple: Figure out what type of holster you need. If you’re a uniformed police officer or security guard and you’ll be chasing and wrestling with offenders, get a holster that has a safety level retention feature. If you’re working plainclothes or carrying a concealed weapon, you may not need a Level IV holster. A good pancake holster with a securing thumb-snap might be all you need. One thing I would avoid, however, is tucking your gun into your beltline without a holster. Not only does this require constant adjustments, but it’s also a conspicuous signal that you’re packing. (Ask any copper who’s earned his chops and he’ll confirm this.)
I’d also like to address where on your belt or body to position your holstered sidearm. Generally, I’d say positioning it on the hip area of your dominant side is best. Exactly where or whether it’s inside or outside the pants is up to you. I’ve always preferred an outside the pants pancake holster worn slightly in back of my pelvis. This allowed for better concealability in that the pistol fit along the contour of my back. Sure, I had to reach farther back to draw, which added a few seconds, but it also lessened the chance that an assailant could grab my gun in a close-quarter confrontation. It was also more easily concealed by an accompanying, loose-fitting garment.
However, there are many carry variations, and you have to choose the one that’s best for you. These include a cross-draw position (in which the handgun is positioned on your non-dominant hip with the butt facing outward), a shoulder holster (worn under your arm on the non-dominant side), an ankle holster (worn on either leg), or an appendix holster (where the gun is positioned in the center of your abdomen). There are accompanying potential problems with all of these variations.
Cross-draws and drawing from a shoulder rig, for instance, require a lot of extra movement in which you must reach across your body. Drawing from a shoulder-holster often requires assistance from your non-dominant hand. Neither of these can be accomplished with reasonable speed or alacrity. Additionally, in close quarter combat, an assailant might be able to block your arm by pinning it to your body. In fairness, this danger exists with a weapon on your strong-side hip, too, but this position can allow for you to fire into the lower region of your assailant’s body, provided you have a good grip on your weapon. Bending down to grab your gun from an ankle holster is a risky and time-consuming move.
The holster I’m really leery about is the appendix model, worn in the center of the abdomen. While it offers quick access, if the muzzle is pointed downward, guys, it’s pointed at a very important area. I’ll skip relating a horror story about this last one, but suffice it to say, it didn’t have a happy ending for a fellow I knew who jammed his pistol into the front of his pants. Suffice it to say, I wouldn’t recommend carrying a gun that was pointing down toward your family jewels. If you do, make sure you use extra caution when pulling it out. This brings us to the second element of the proper draw.
Smooth Motion
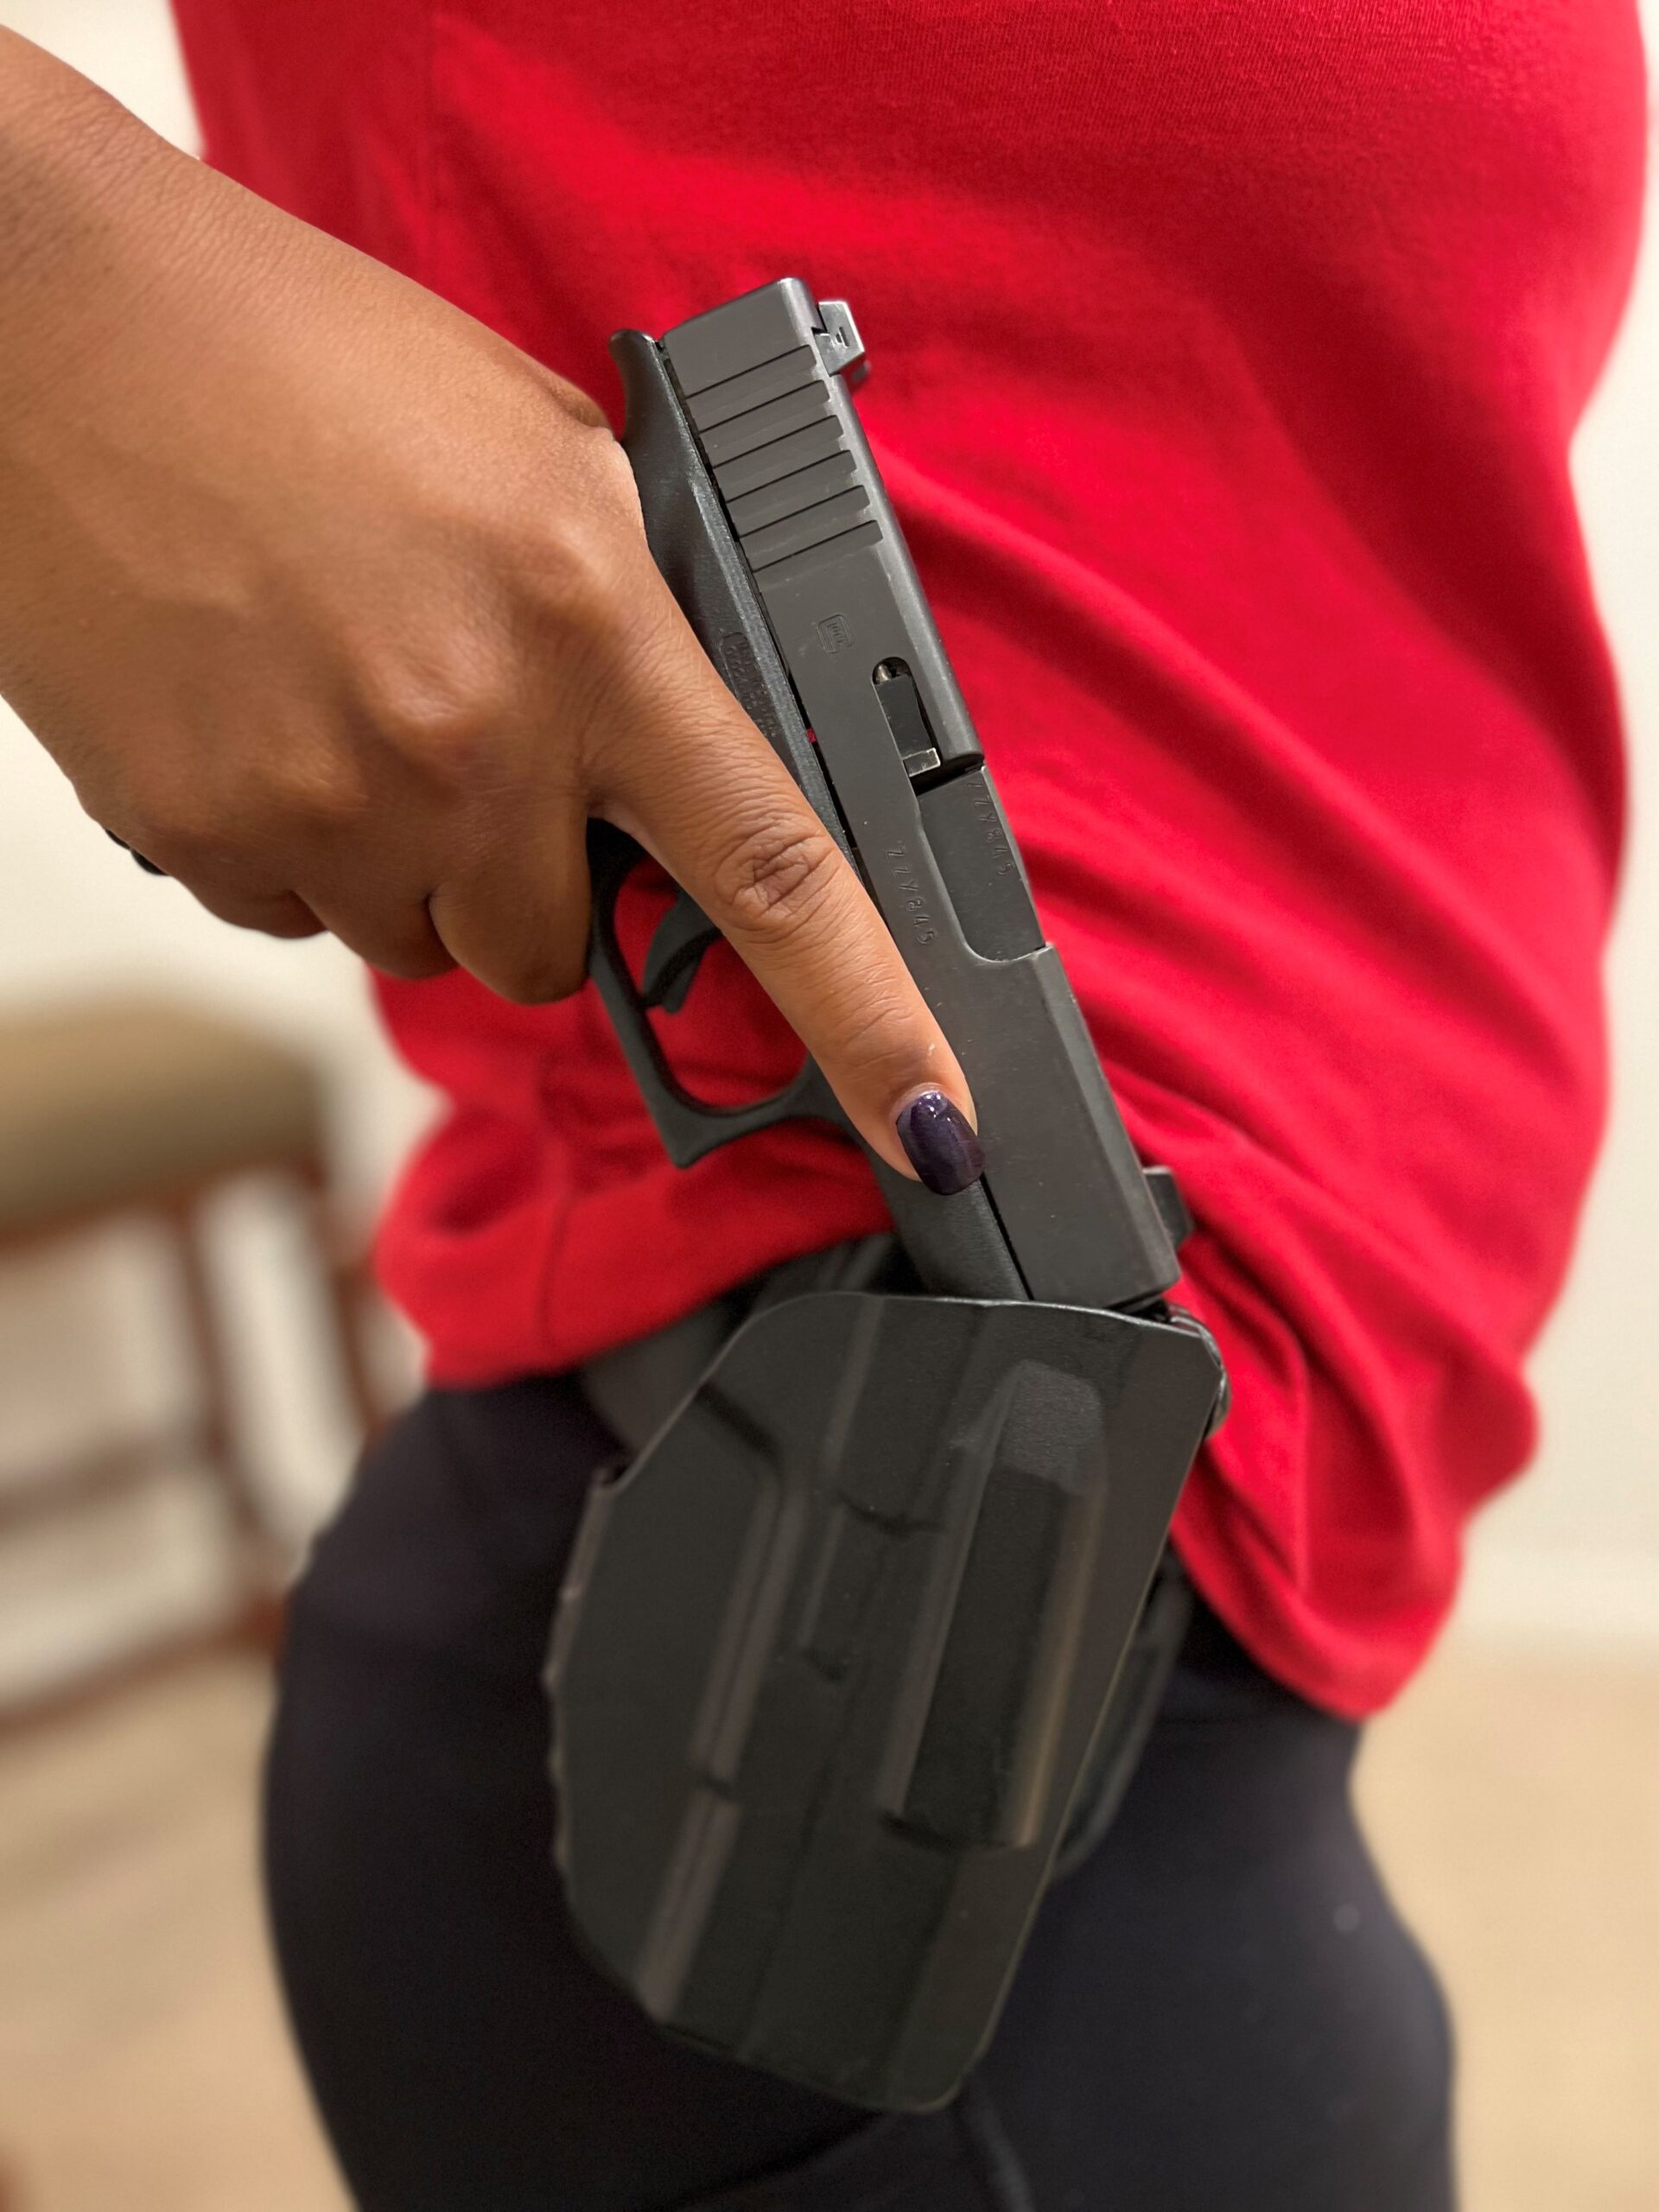
Whether you’re wearing an exposed holster, or one that’s concealed, the initial gripping motion should be the same once your hand comes in contact with the grip of the gun.
With most semi-automatic pistols you have a tang or beavertail , on top of the grip just below the slide. This feature is designed to fit snuggly against the web of your hand. Keep your index finger straight, as if you were pointing, then curl your other fingers around the base of the grip. It’s important to keep your trigger finger out of the trigger guard until you’re ready to fire.
Believe me, the last thing you want is to accidentally jerk that trigger when drawing your gun.
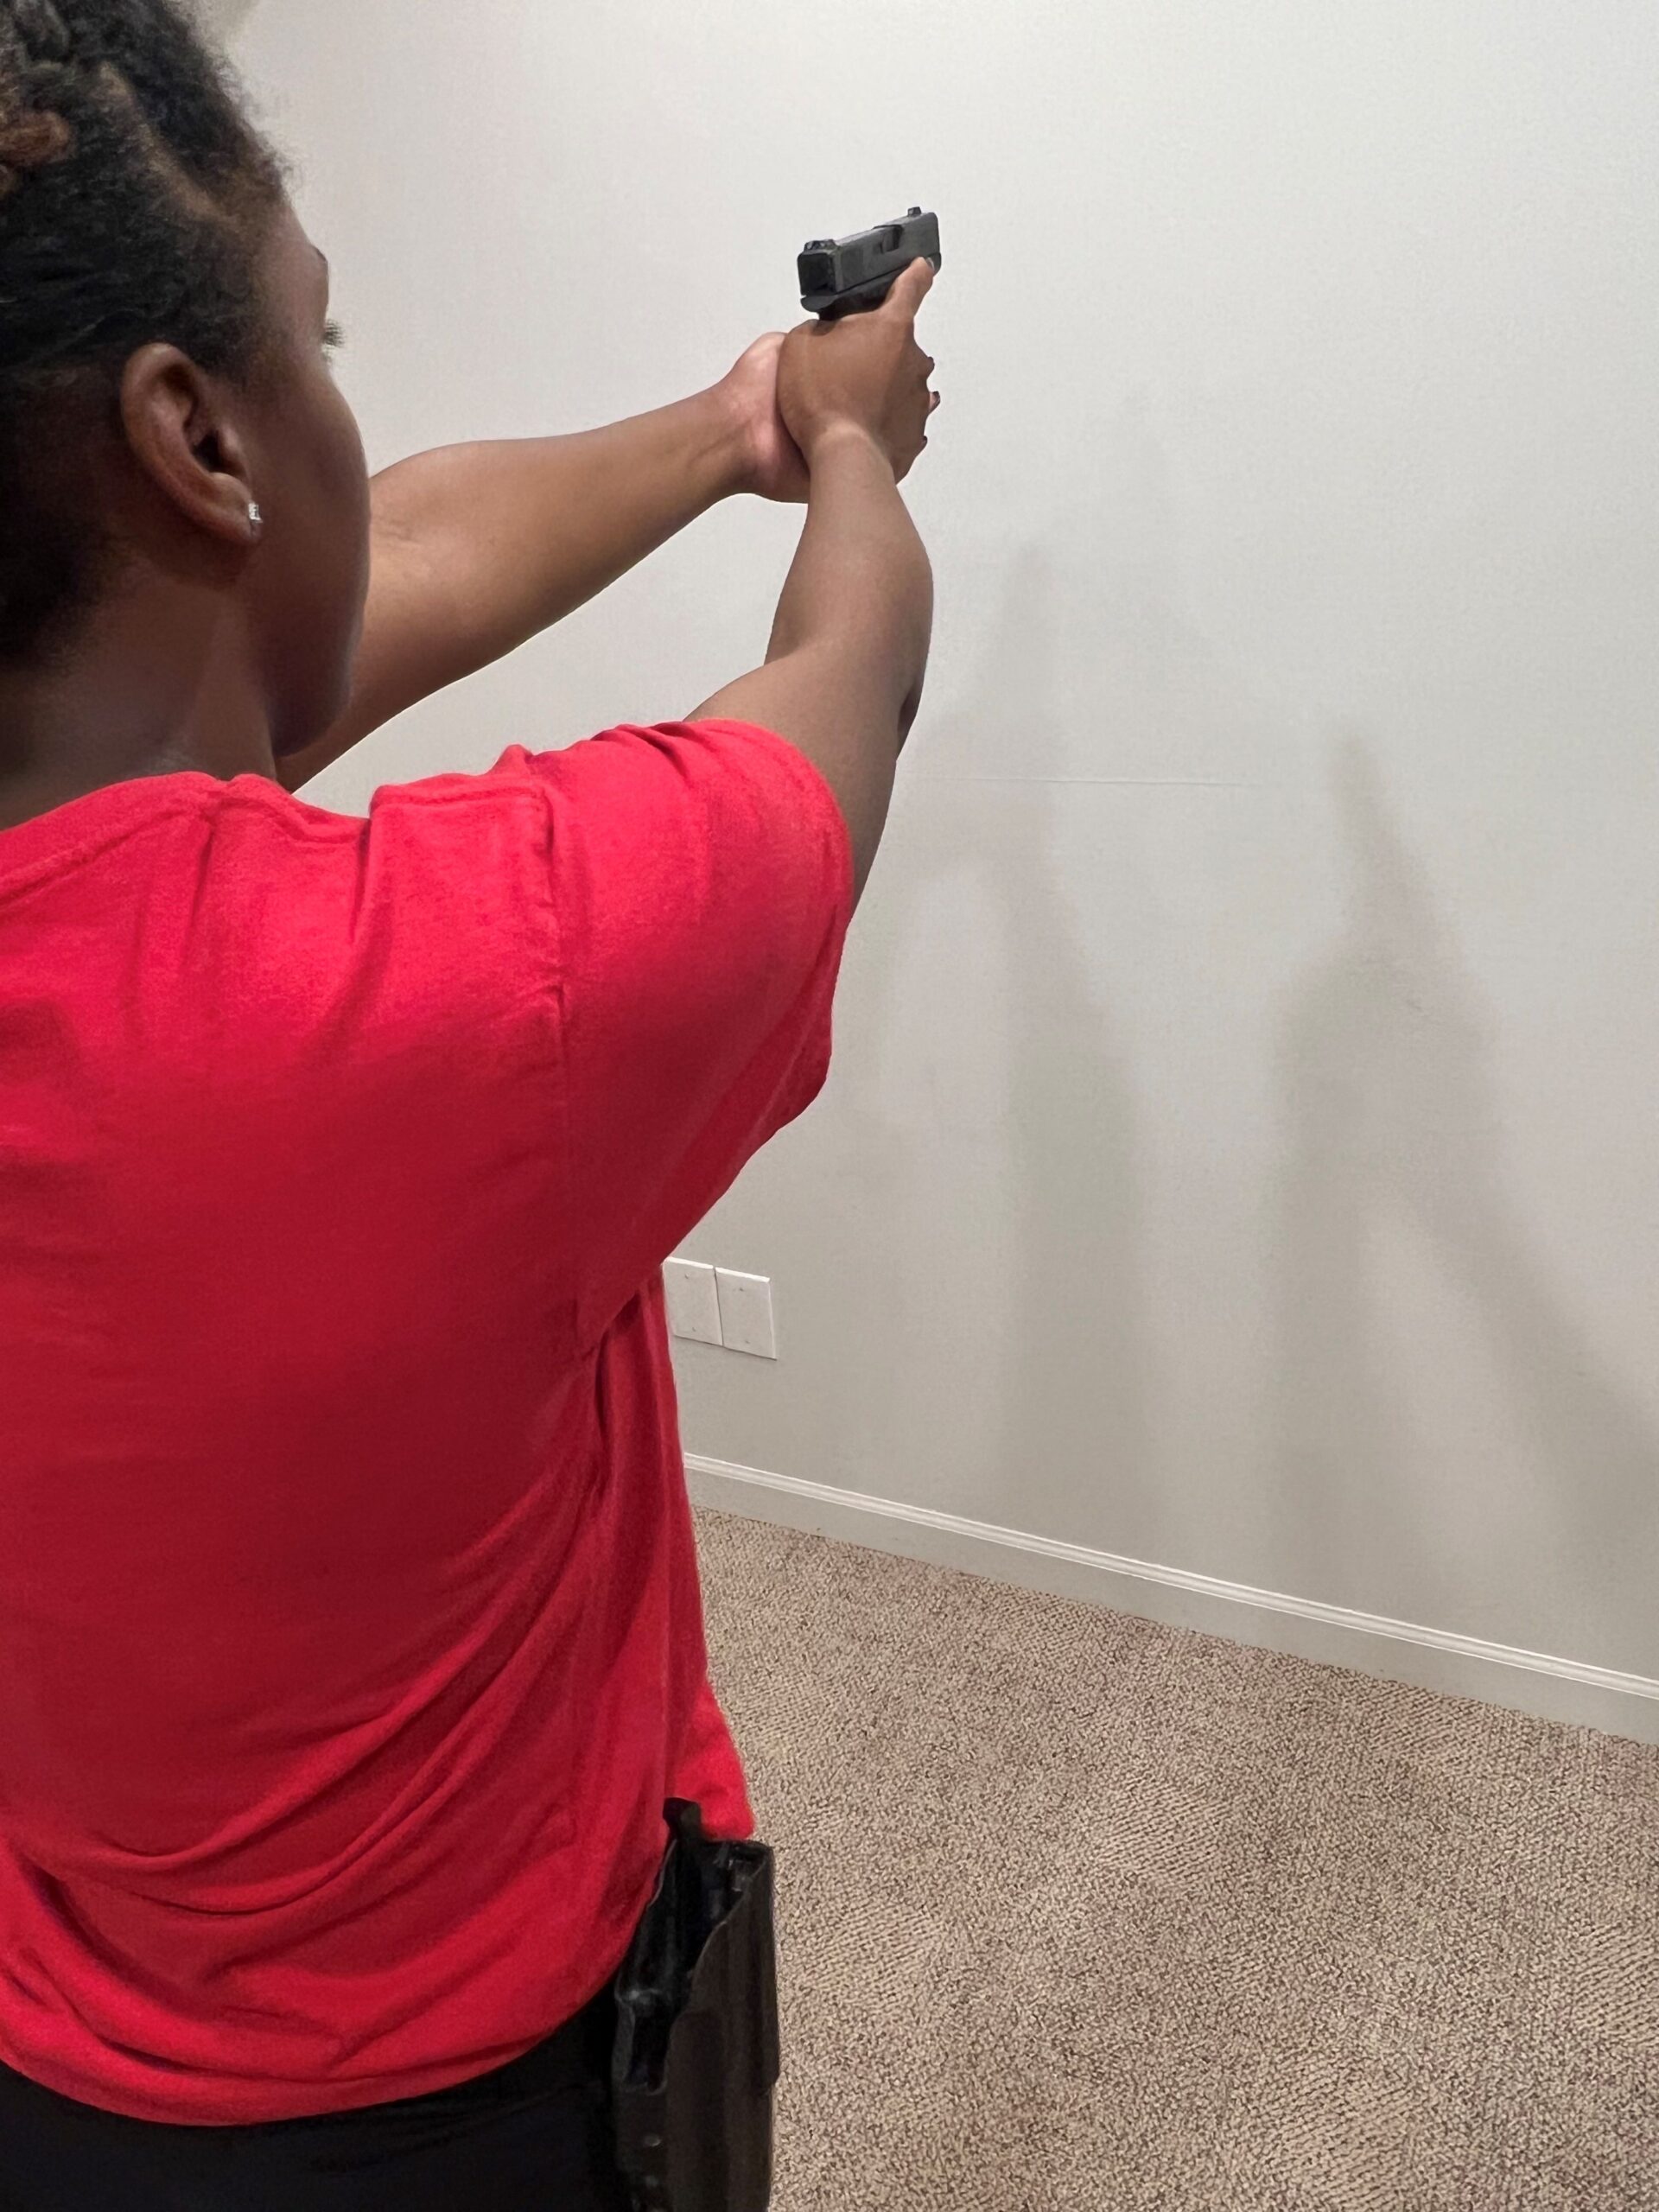
Acquiring a Proper Grip
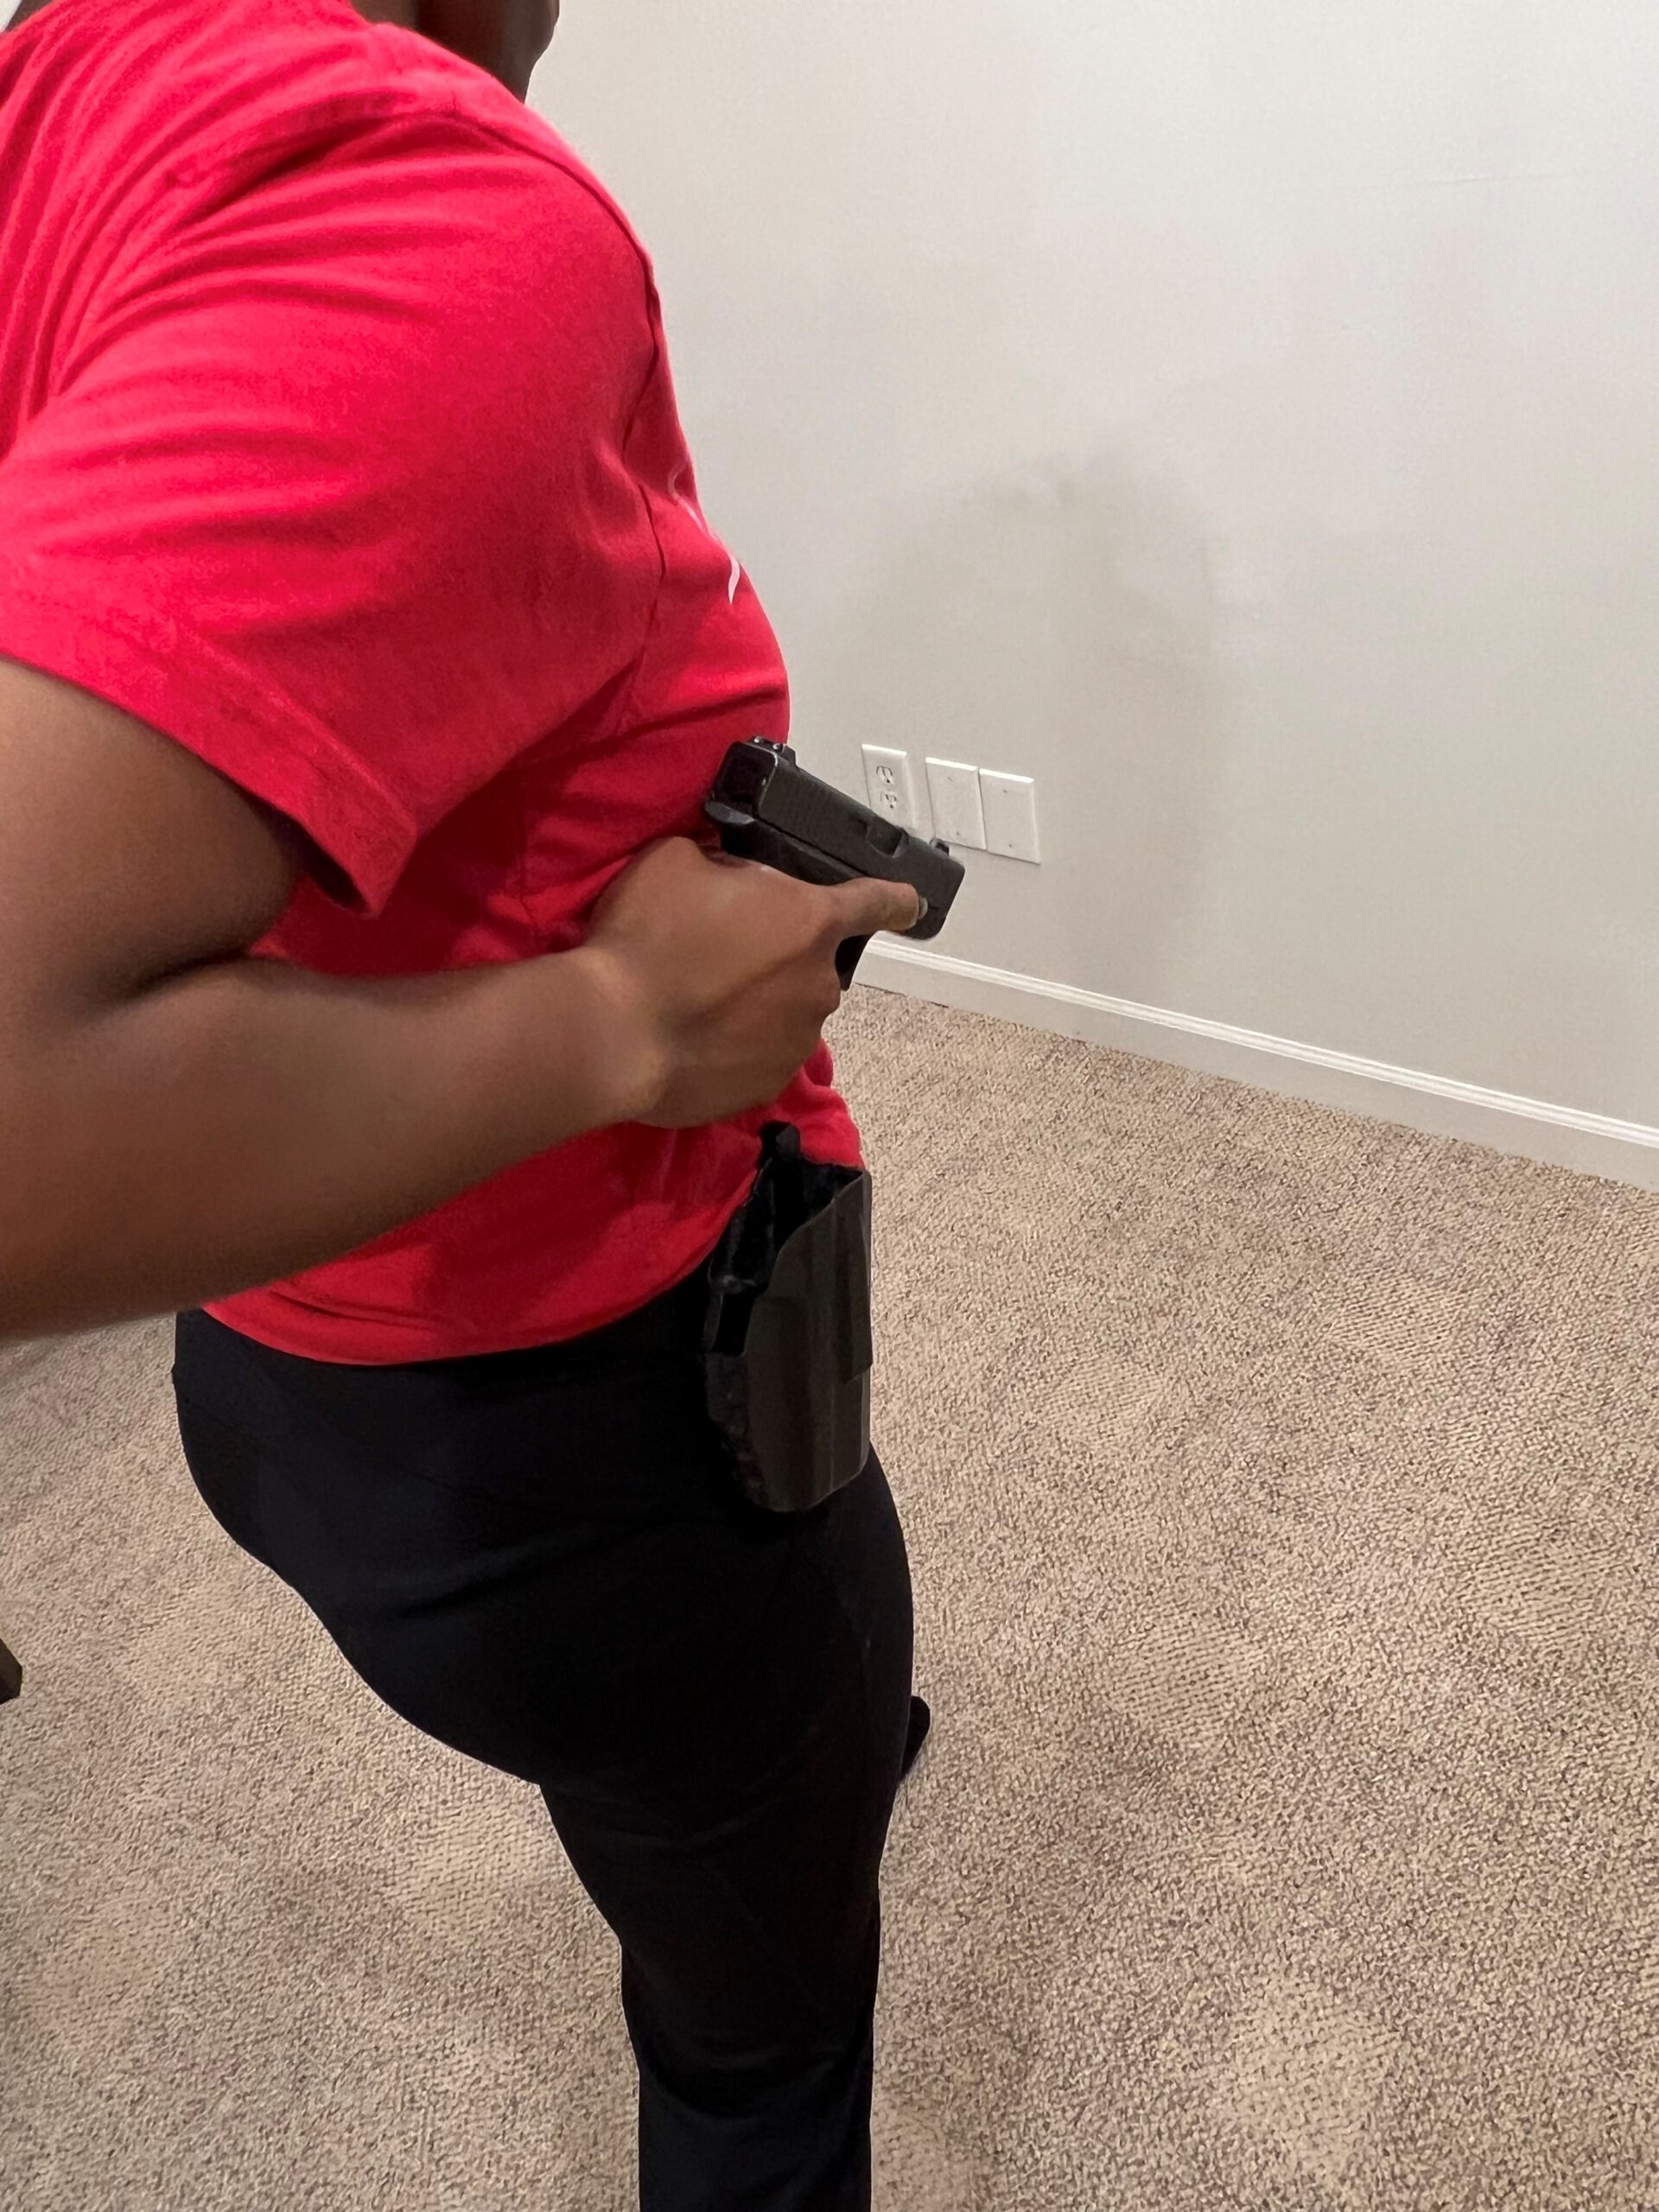
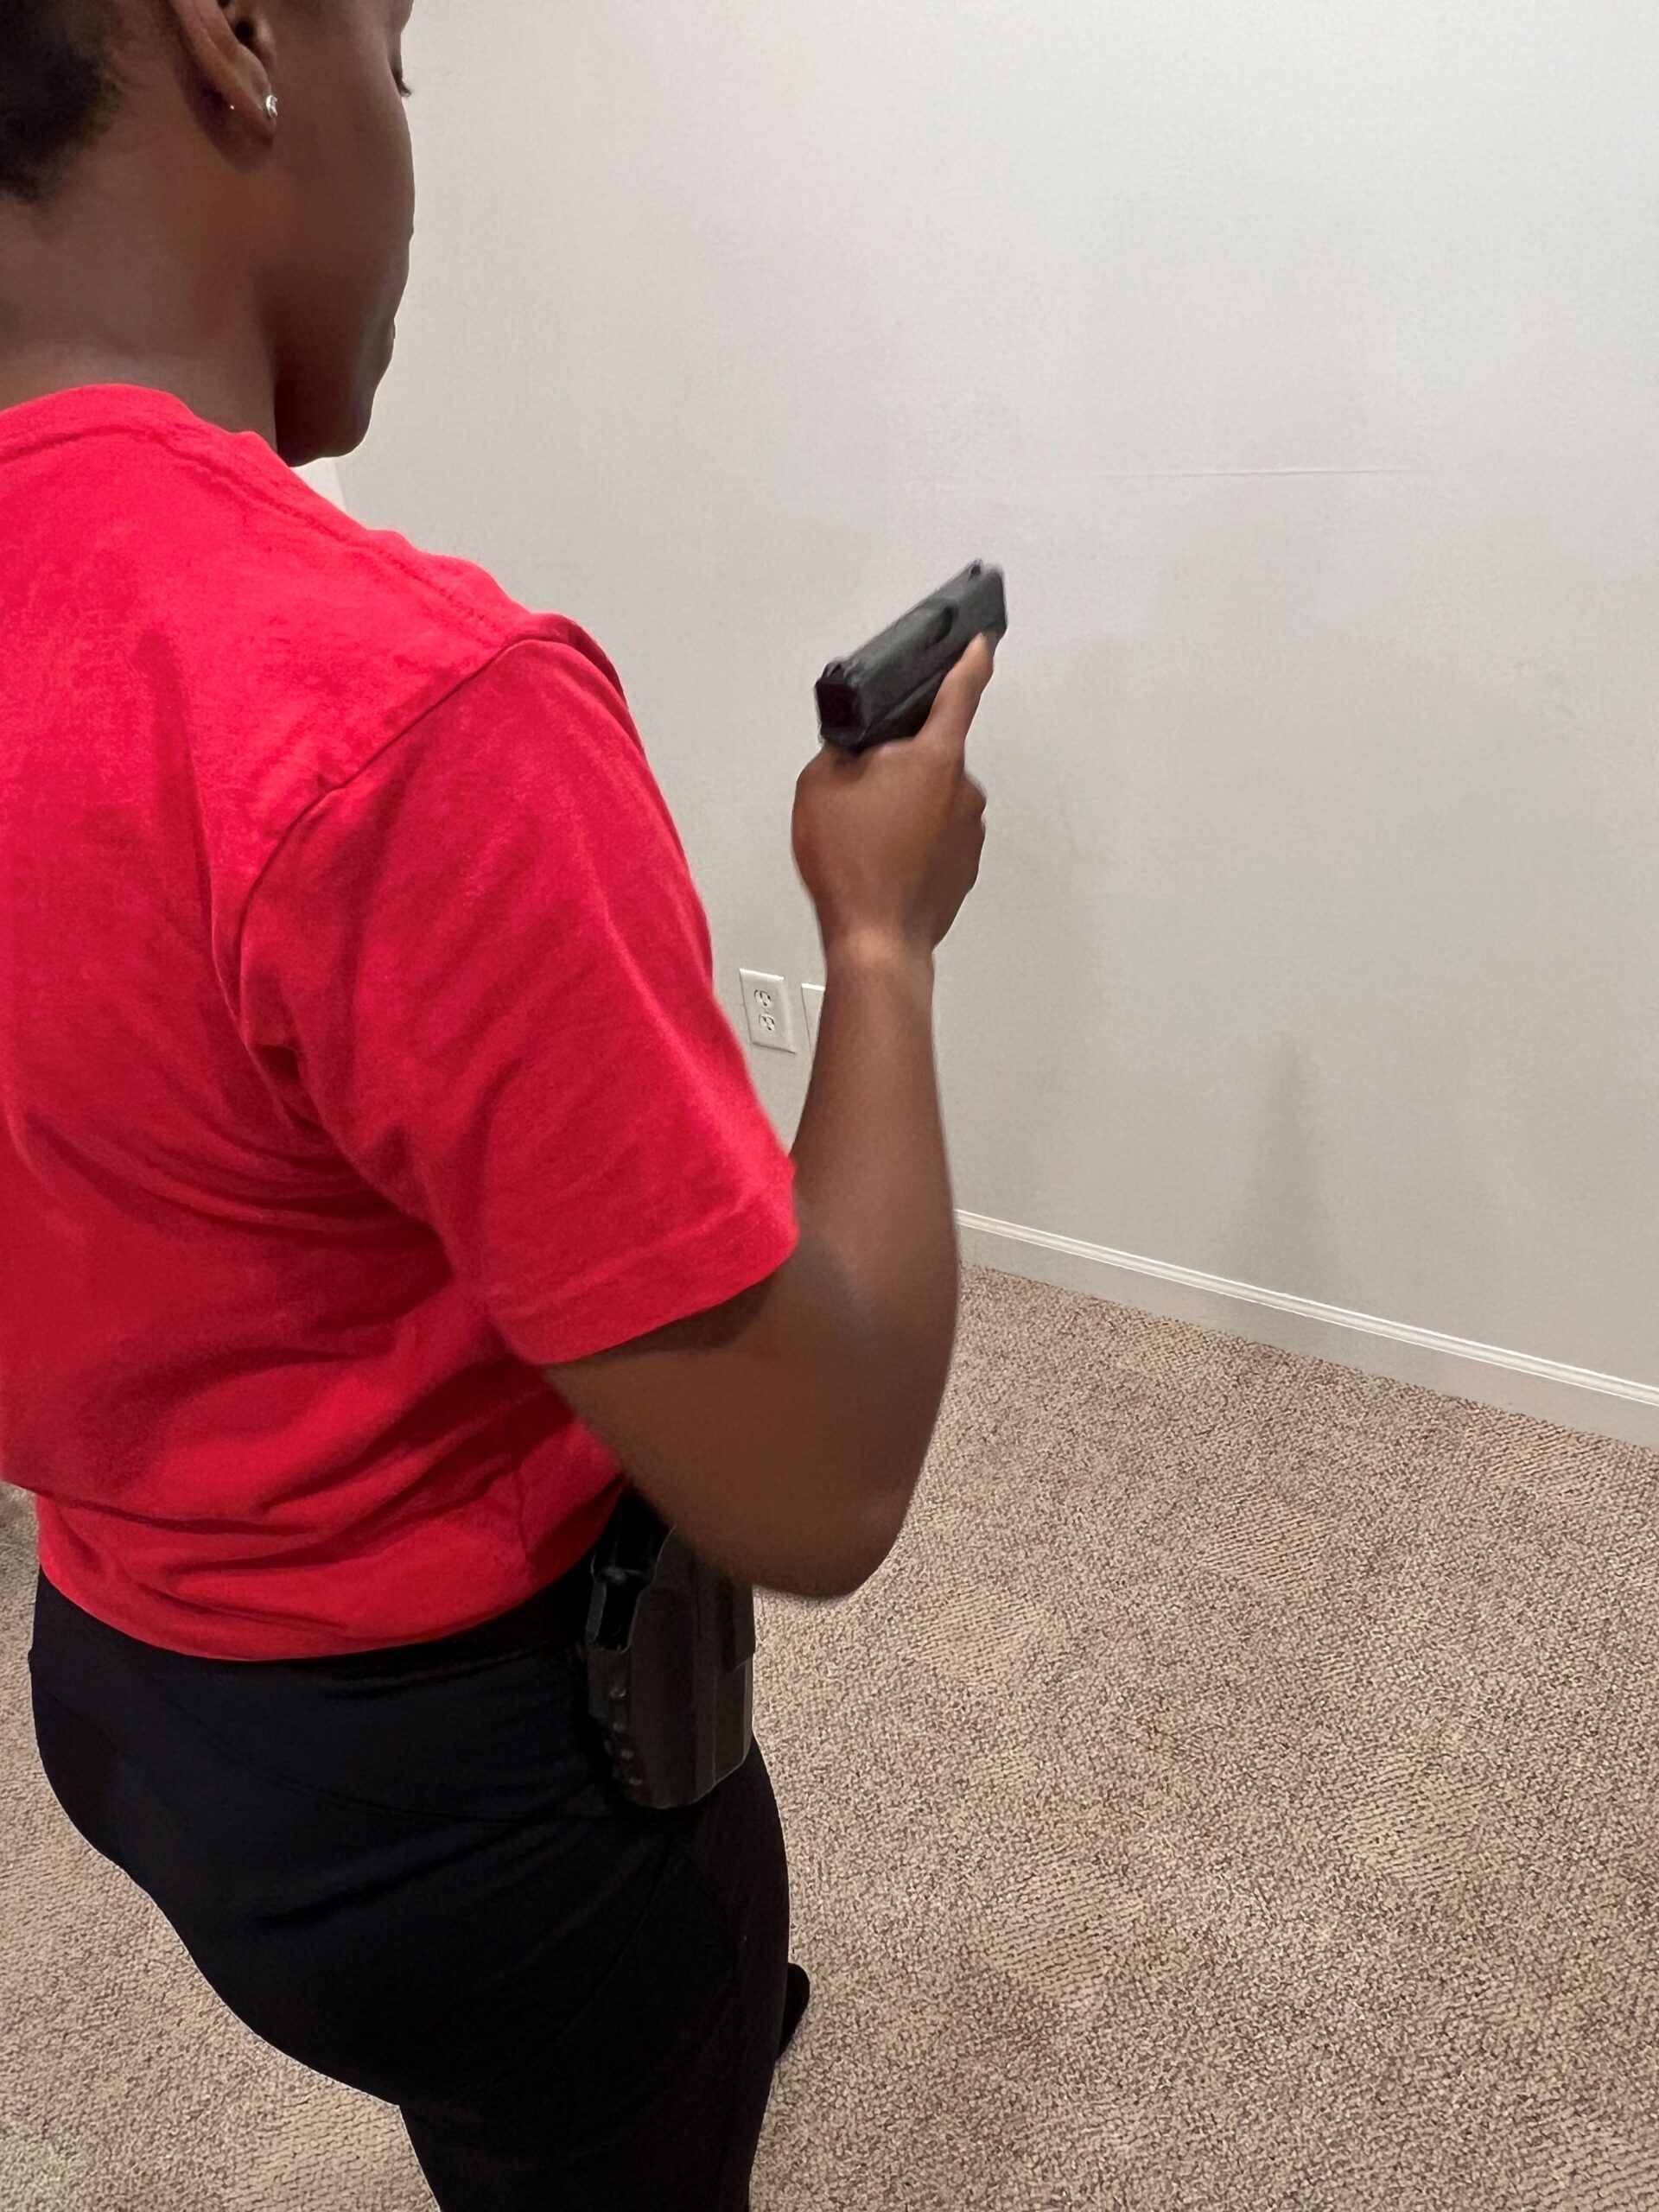
Bringing your hand to make contact with the pistol depends on where exactly it’s positioned on your belt, but once it’s cleared the holster, while keeping your elbow tucked in, “punch” the gun outward while you bring it straight up to chest level. From here, you can bring your non-dominant hand in for support and extend your arms to acquire target acquisition. Your support hand should fit over your bottom three knuckles and both of your thumbs should be facing toward the front. Only when you are going to fire, do you bring your trigger finger inside the trigger guard and onto the trigger.
And remember, squeeze it, never jerk it. A jerking motion will send the muzzle off to the side meaning you could very easily miss your intended target. The purpose of using your non-dominant hand for support is to press back against your stronger dominant hand to minimize recoil and muzzle-rise to help you stay on target.
Remember, in an emergency confrontation, aim for center mass. Squeeze off as many rounds as you need to stop the threat. Forget about Roy Rogers and Gene Autry shooting guns out of the bad guy’s hand. Depending on such things as the attire or the assailant, lighting conditions, distance, etc. you may not be able to determine where or even if you’ve hit the attacker. And don’t expect your adversary to drop like they do on TV. A person is still able to move and do harm even after sustaining a non-survivable wound.
That’s three, so what about the fourth essential element?
Simple… It’s practice, practice, practice. Developing muscle memory is an important factor in how you will react under stress. Whether you’re talking boxing, the martial arts, or shooting, you must master the basic skills before you become proficient. This requires repetition and practice. Naturally, it’s advisable not to practice your drawing technique with a loaded gun, unless you’re on a firing range and even then it’s not advisable unless you’ve perfected the motion and are ready for a live fire drill. If you’re practicing anywhere else, make sure you unload your gun, check it, and then check it again.
Remember, the way you train is the way you’ll react.